

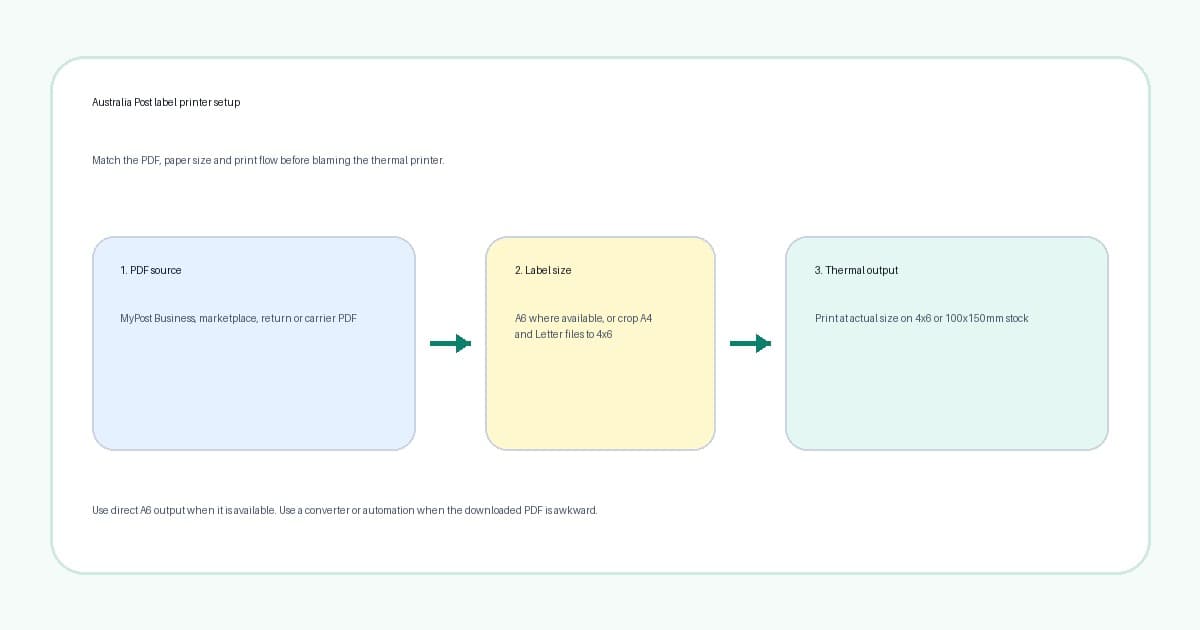
Australia Post label printer setup is mostly a format-matching problem. The printer, the PDF and the label stock all need to agree before the print button is useful.
For many MyPost Business domestic labels, you may be able to use an A6 or one-label-per-page output. That is the cleanest path when it is available and your label stock matches it. The messy part starts when you already have an A4, Letter, marketplace, return or older downloaded PDF that does not fit the thermal printer cleanly.
This guide shows the practical setup for Australia Post and MyPost Business sellers who want thermal labels without the daily Acrobat, screenshot, crop and print-dialog routine.
In this article:
- The fast setup path
- Choose A6 when the workflow supports it
- Handle A4, Letter and awkward PDFs safely
- Set the thermal printer size and scale
- Test the full chain before a batch
- Automate repeated Australia Post label fixes
- Related Australia Post label guides
The fast setup path
Start with the file you actually downloaded, not the carrier name on the label.
A thermal printer can only print the page it receives. If that page is already A6, 4x6 or 100x150mm, your job is to make the driver and print dialog match it. If that page is A4 or Letter with the label sitting inside it, your job is to crop or convert the label area before printing.
Use this order when you are setting up an Australia Post label printer workflow.
- Download the label PDF from your shipping workflow.
- Check whether the PDF page is A6, A4, Letter, 4x6 or 100x150mm.
- If the PDF is already label-sized, print at actual size or 100 percent.
- If the label sits inside A4 or Letter, convert the label area to 4x6 or 100x150mm first.
- Set the printer driver paper size to match the stock in the printer.
- Turn off browser headers, footers, fit-to-page scaling and unnecessary margins.
- Print one test before running a batch.
- Save the working preset once the label is sharp, centred and scannable.
That order keeps the problem in the right layer. Changing print darkness will not fix an A4 PDF being shrunk onto thermal stock. Cropping a PDF that was already label-sized can create a new problem.
If you want a broader primer before this Australia Post-specific flow, the MyPost Business thermal printer guide covers the usual seller setup from account workflow to printer output.
Choose A6 when the workflow supports it
Do not assume every Australia Post or MyPost Business label needs to be cropped.
Many domestic MyPost Business workflows can produce A6 or one-label-per-page output when the account, order path and label settings support it. If you can get a clean A6 file and you use matching A6 stock or a driver preset that handles that output correctly, use it. That is better than adding a converter step for no reason.
The safe question is simple: does the downloaded page already match the label stock you loaded?
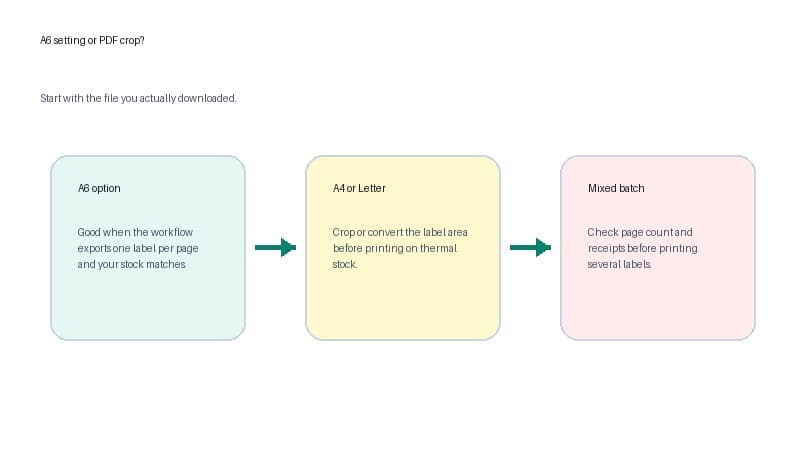
Use A6 directly when:
- The PDF page is one label per page.
- The label preview fills the page without a large office-paper border.
- Your label stock and printer preset match the output.
- The barcode is not being shrunk or clipped.
- You can repeat the same setting tomorrow without changing the print dialog.
Move to a crop or conversion workflow when:
- The label sits on an A4 or Letter page.
- The print preview shows a tiny label with lots of white space.
- The same workflow sometimes gives A6 and sometimes gives A4.
- You are handling returns, international labels, marketplace exports or older PDFs.
- Staff keep using screenshots, Word documents or manual drag-to-fit workarounds.
The why MyPost Business exports A4 PDFs guide explains the format split in more detail and keeps the wording safe: MyPost can support A6 in many cases, but sellers still run into awkward PDF files in the real world.
Handle A4, Letter and awkward PDFs safely
If the PDF is A4 or Letter, do not send the whole page straight to a 4x6 thermal printer and hope the driver guesses the right rectangle.
That is how labels print too small, cut off, sideways or blurry. The printer may shrink the whole office-paper page onto one small label. It may clip one corner. It may rotate the file because the page size and feed direction disagree.
For one-off labels, use the free A4 to 4x6 shipping label converter. It is the fastest path when you already have an awkward PDF and just need a clean label-sized file today.
If you are not sure what you downloaded, use the shipping label size checker before converting. That helps you separate A4, Letter, A6, 4x6, 6x4 and 100x150mm files before you waste labels.
Avoid the screenshot workflow unless there is no other choice. A screenshot turns a clean PDF barcode into pixels at screen resolution. When you resize that image again, the barcode edges can soften. The label may look fine at a glance, but a scanner is less forgiving than a person reading the address.
If you need the step-by-step crop-first workflow, use the guide to cropping a shipping label PDF to 4x6. It focuses on the PDF layer before printer settings.
Set the thermal printer size and scale
Once the PDF shape is right, make the printer settings boring.
For most Australia Post thermal workflows, your likely targets are A6, 4x6 inches, 6x4 inches, 100x150mm, 101x152mm or 102x152mm. Use the exact size your printer driver and label stock support. The wording varies by Dymo, Zebra, Brother, MUNBYN, Rollo and other 4 inch thermal printers.
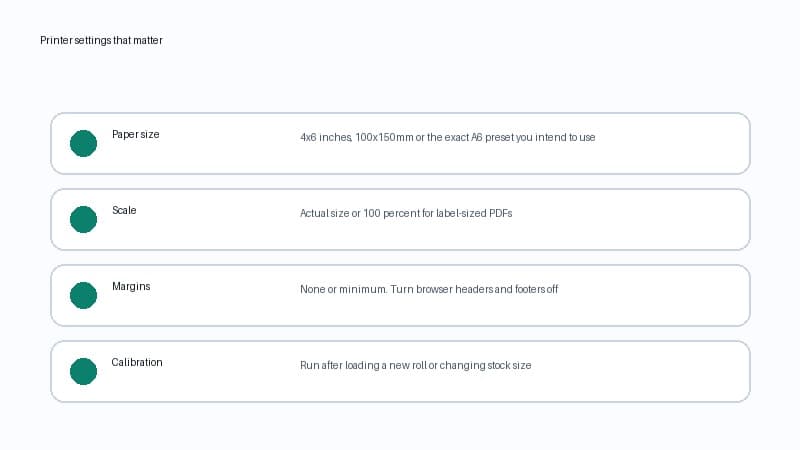
Use this baseline.
| Setting | Choose first | Avoid while troubleshooting | |---|---|---| | Paper size | A6, 4x6 or 100x150mm to match the file and stock | A4 or Letter for thermal stock | | Scale | Actual size or 100 percent | Fit to page, shrink oversized pages | | Margins | None or minimum | Browser headers, footers and extra margins | | Orientation | The preview that fills one label | Blind portrait or landscape guesses | | Calibration | Run after stock changes | Skipping feed calibration after changing rolls |
If you use a Dymo LabelWriter 4XL, start with the Dymo 4XL MyPost Business setup guide. Zebra users can use the Zebra Australia Post setup checklist. Brother users can use the Brother MyPost Business guide.
Those printer-specific guides matter because the paper-size preset can be hidden in different places. The principle stays the same: the PDF page, driver paper size and physical label stock should describe the same output.
Test the full chain before a batch
A single successful demo label does not prove the whole workflow is safe.
Test the exact chain you will use on a shipping day: download label, check page size, apply any crop or conversion, print at actual size, check barcode, then print a small batch. If the first label works but the third label drifts, you may have a calibration or label-feed problem. If every label is tiny, the PDF or print scale is probably wrong.
Before printing a batch, check:
- One PDF page equals one physical label.
- Receipts, customs forms and instructions are not being sent to the label printer by accident.
- The print preview fills the label instead of showing a tiny label on white paper.
- The barcode has clear white space around it.
- The same saved preset appears after closing and reopening the print dialog.
- A real carrier or marketplace label prints as cleanly as a test label.
If the label prints too small, use the shipping label printing too small checklist. If one edge is missing, use the shipping label cut-off troubleshooting guide. If the barcode is fuzzy, use the blurry shipping label barcode guide.
For several labels in one PDF, inspect page count before converting or printing. The shipping label batch tool is useful when the file contains multiple labels, receipts or mixed pages.
Automate repeated Australia Post label fixes
Manual setup is fine when the problem happens once.
It gets annoying when the same fix repeats every shipping day. Open the download, check if it is A6 or A4, crop the label, save a converted file, choose the printer, check scale, print, repeat. That is packing time spent on software instead of orders.
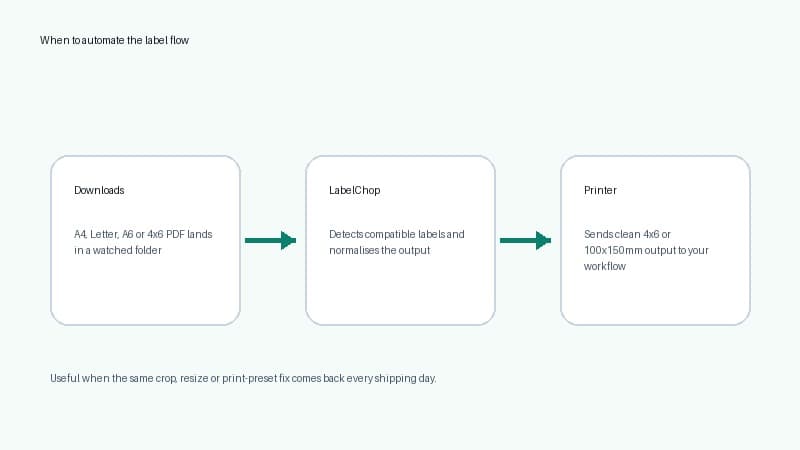
LabelChop is built for that recurring PDF step. It watches a folder, detects compatible shipping-label PDFs, crops or resizes awkward pages to 4x6 or 100x150mm output, then prints or saves the cleaned file for your normal thermal printer workflow.
It works after you have the PDF. It does not buy postage, replace your printer driver or create an official integration with Australia Post, MyPost Business, eBay, Shopify, Etsy, USPS, Royal Mail or any other carrier or marketplace.
Use the free converter when you only need to rescue one awkward label. Use automation when the same crop and print step keeps coming back. The watch folder automatic label printing guide shows how that folder flow works, and the LabelChop pricing page gives the current trial and plan options.
Related Australia Post label guides
Keep the setup connected to the exact problem you see next.
- Print MyPost Business labels on a thermal printer, for the core Australia Post workflow.
- Why MyPost Business exports A4 PDFs, for A6-safe format context.
- Dymo 4XL MyPost Business setup, for Dymo-specific paper-size checks.
- Zebra thermal printer setup for Australia Post, for Zebra ZD421, ZD220 and GK420d style setups.
- 4x6 thermal labels in Australia, for label-stock sizing and terminology.
- A4 to 4x6 shipping label converter, for one-off awkward PDFs.
The best Australia Post label printer setup is the one you stop thinking about. Use direct A6 output when your workflow supports it, crop awkward A4 or Letter files before printing, and automate the PDF step when it becomes a daily habit.