

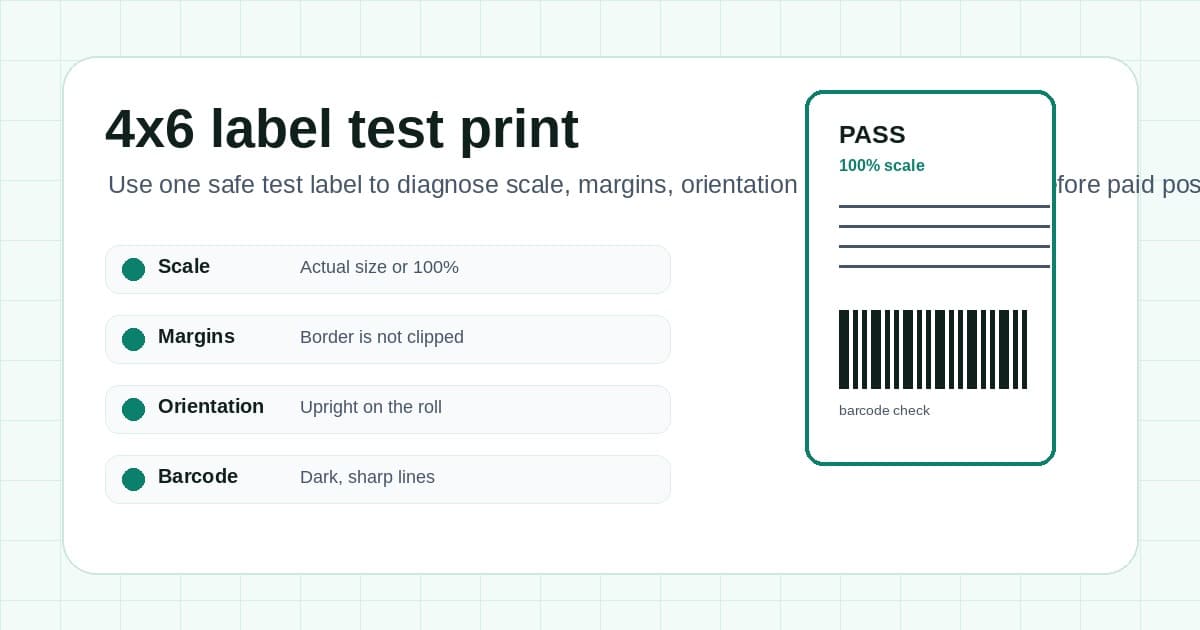
A 4x6 label test print is the safest way to check a thermal printer before you waste paid postage. It removes the carrier, marketplace and customer data from the problem so you can focus on the basics: paper size, scale, margins, orientation and barcode sharpness.
If the test file prints badly, your next real label will probably print badly too. If the test file prints cleanly but your actual USPS, Royal Mail, Australia Post, eBay, Etsy or Shopify label fails, the printer is probably fine and the real PDF needs checking.
This guide shows how to run the test, read the result and choose the next fix without changing ten settings at once.
In this article:
- The quick 4x6 test print sequence
- What a good test print looks like
- Read the symptom before changing settings
- Fix a test label that prints too small
- Fix clipped, sideways, blurry or blank test labels
- When the test print passes but the real label fails
- Related 4x6 test print tools and guides
The quick 4x6 test print sequence
Start with a neutral file, not a live postage label.
- Download the free thermal printer test label PDF.
- Load 4x6 inch, 6x4 inch or 100x150mm direct thermal stock.
- Open the PDF in Preview, Adobe Acrobat, Chrome, Edge or your normal PDF viewer.
- Choose your thermal printer, not the office printer.
- Set paper size to 4x6 inches or 100x150mm.
- Set scale to actual size, no scaling or 100 percent.
- Turn off browser headers, footers and extra margins if they appear.
- Print one label, then inspect it before changing anything else.
That order matters. A test print is useful because it gives you a known-good source file. If it fails, the problem is likely in the printer driver, print dialog, stock, calibration or hardware. If it passes, you can stop blaming the printer and inspect the real shipping-label PDF.
Use the 4x6 shipping label settings checker if you want a guided version of the paper-size and scale checks before reprinting.
What a good test print looks like
A good 4x6 test print should look boring.
The outer border should be complete. It should not touch the edge or disappear on one side. The label should fill the stock without looking tiny, stretched or enlarged. Barcode-style lines should be dark and sharp. Centre marks should sit where you expect them, and the printer should feed exactly one label.
Do not judge only from the screen preview. Pick up the printed label and check the physical result. Thermal printers can look fine in preview but clip the edge if the driver paper size, custom size or printable area is wrong.
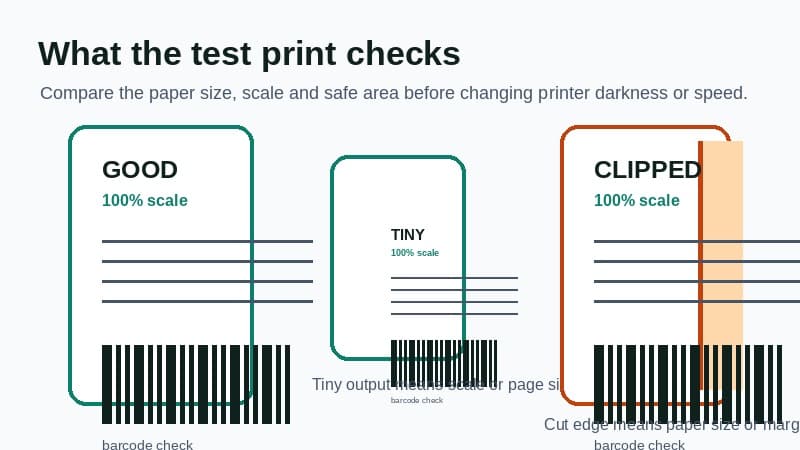
Use this quick pass.
| Check | Good result | Problem sign | |---|---|---| | Size | Fills one 4x6 label | Tiny label in the middle | | Border | Complete on all sides | Top, side or barcode cut off | | Orientation | Address area is upright | Label prints rotated or sideways | | Barcode lines | Dark, even and sharp | Faint, smeared or fuzzy lines | | Feed | Stops at next label start | Drifts down the roll or feeds extras |
If you are not sure whether you need a blank template, a test label or a real carrier label, read the sample 4x6 shipping label PDF guide before putting anything on a customer parcel.
Read the symptom before changing settings
The fastest way to waste labels is to guess. Darkness, speed, paper size, orientation, scale and calibration can all affect output, but they do not solve the same problem.
Use the first visible symptom as the branch.
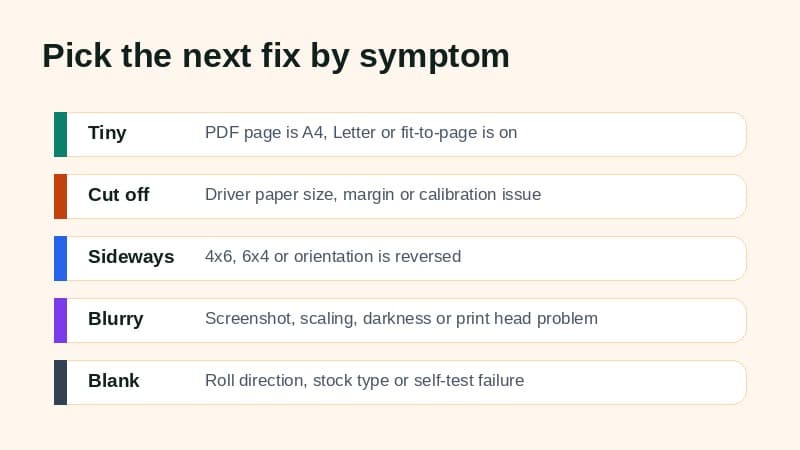
| Test print symptom | Likely layer | First fix to try | |---|---|---| | Tiny output | Scale or paper size | Set 4x6 paper and 100 percent scale | | Oversized output | Custom scale or wrong driver size | Reset scale, then use the shipping label too big guide | | One edge cut off | Paper size, margin or calibration | Recheck driver size and printable area | | Sideways output | Orientation or width and height reversed | Try 100x150mm versus 150x100mm settings | | Blurry barcode lines | Scaling, screenshot workflow, darkness or print head | Print the PDF directly, then check darkness | | Blank label | Roll direction, stock type or hardware self-test | Check printable side and printer self-test | | Extra labels feed | Calibration or gap detection | Calibrate after loading the roll |
Change one layer, print one test label, then inspect again. If you change every setting at once, you will not know which change fixed the problem.
Fix a test label that prints too small
A tiny test label usually means the file was shrunk before it reached the stock.
Check the paper size first. The printer driver should be set to 4x6 inches, 6x4 inches only when your driver expects that orientation, or 100x150mm. Avoid A4, Letter, A6, 100x100mm or old product-label presets.
Check scale next. Use actual size, no scaling or 100 percent for the neutral test PDF. Fit to page can shrink a correct 4x6 PDF because the driver reports a small non-printable area. Shrink oversized pages can do the same thing.
If you print from a browser, turn off headers, footers and margins. A browser can treat the PDF like a web page and add a title, date or URL. That extra page treatment can move or shrink the label.
If the output is still small, try another PDF viewer with the same paper size and scale. Preview, Acrobat, Chrome and Edge can expose slightly different print controls. The goal is not to find the fanciest app. The goal is to stop silent resizing.
For a numeric check, use the shipping label print scale calculator. Enter the source page size, target label size and current scale so you can see whether the label is being reduced before it prints.
If the test label is too large, do the opposite check. Look for a custom scale above 100 percent, a paper size smaller than the stock, or a saved browser preset that is expanding the PDF. The shipping label too big troubleshooting guide covers oversized output and labels spreading across two stickers.
Fix clipped, sideways, blurry or blank test labels
If the test label is clipped, do not enlarge or shrink the label by guesswork. Recheck the physical stock and driver paper size first. Then check whether the preview shows content touching the printable edge. If only one side disappears, the paper width, orientation or calibration may be wrong. The shipping label cut-off troubleshooting guide goes deeper on edge and margin problems.
If the label prints sideways, the width and height may be reversed. Some systems describe the same physical stock as 4x6, 6x4, 100x150mm, 150x100mm, portrait or landscape. Choose the setting that makes the preview match the label roll in your hand. The shipping label orientation guide covers that naming mess in more detail.
If barcode-style lines look blurry, do two checks before changing hardware. First, confirm you printed the PDF directly rather than a screenshot or image pasted into a document. Second, confirm scale is still 100 percent. After that, check darkness, speed, stock quality and whether the print head needs cleaning. The blurry shipping label barcode guide explains those quality checks.
If the label is blank, stop changing PDF settings. Blank output usually means the roll is loaded wrong way around, the stock is not direct thermal, the wrong media type is selected, the print head is not heating, or the printer self-test also fails. Use the blank thermal labels checklist before sending another paid postage label to the queue.
When the test print passes but the real label fails
A clean test print proves the printer can produce a 4x6 label. It does not prove every carrier or marketplace PDF is ready for that printer.
Some workflows give you a true 4x6 or 6x4 PDF. Others give you A4, Letter, A6, a page with receipt information, a multi-label sheet or a label in one corner of a larger page. That can depend on account settings, browser flow, service type, international labels, marketplace exports or old downloads.
If the neutral test label prints perfectly but a real label prints tiny, cut off or sideways, inspect the real PDF page size. Use the shipping label size checker or carrier format label tool to identify whether the file is already 4x6 or needs conversion first.
For a one-off A4 or Letter file, use the free A4 to 4x6 shipping label converter. If you are manually cropping the same kind of file every week, read the shipping label PDF crop workflow and compare that with local desktop automation.
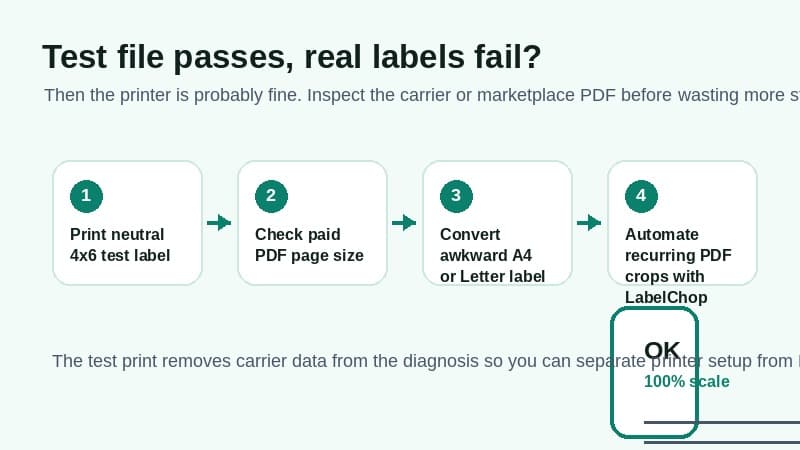
This is where LabelChop fits. It watches a folder, detects compatible shipping-label PDFs, crops or resizes awkward pages to 4x6 or 100x150mm, then prints or saves the output for your thermal printer. It helps with compatible PDFs and workflows from carriers and marketplaces after you have the file. It is not an official USPS, Royal Mail, Australia Post, eBay, Etsy or Shopify integration.
If the test print fails, fix the printer setup first. If the test print passes and only the real PDFs fail, try LabelChop when the crop or resize step has become a recurring part of fulfilment.
Related 4x6 test print tools and guides
Use these next depending on what failed.
- Thermal printer test label PDF, for the neutral 4x6 calibration file.
- Shipping label template generator, for a blank or sample 4x6 address label.
- Sample 4x6 shipping label PDF guide, for choosing between a template, test label and real postage.
- 4x6 shipping labels print settings guide, for the full paper-size, scale and PDF setup.
- Shipping label print scale calculator, for comparing source page size with the target label.
- A4 to 4x6 shipping label converter, for one-off awkward PDF conversion.
The test print is not the whole workflow. It is the clean first check. Once it passes, every failed real label becomes easier to diagnose because you know whether you are fixing the printer or fixing the PDF.