

Printing a Royal Mail label at home should not require a settings hunt every morning. You buy postage, download the label, send it to a 6x4 thermal printer and stick it on the parcel.
The catch is that Royal Mail and Click & Drop workflows can hand you different things: a QR code, a clean 6x4 PDF, an A4 PDF, a marketplace export, or an old download that still has office-paper sizing. Your printer cannot guess which one you meant to print.
This guide is for UK sellers who have a Royal Mail or Click & Drop label and want to print it cleanly at home on a 6x4, 4x6, 100x150mm or 102x152mm thermal printer.
In this article:
- The quick home-print workflow
- Check whether you have a QR code, 6x4 PDF or A4 PDF
- Set the 6x4 thermal-printer defaults
- Print the Royal Mail PDF at actual size
- Fix tiny, cut-off, sideways or blurry labels
- When home printing should become automated
- Related Royal Mail and 6x4 guides
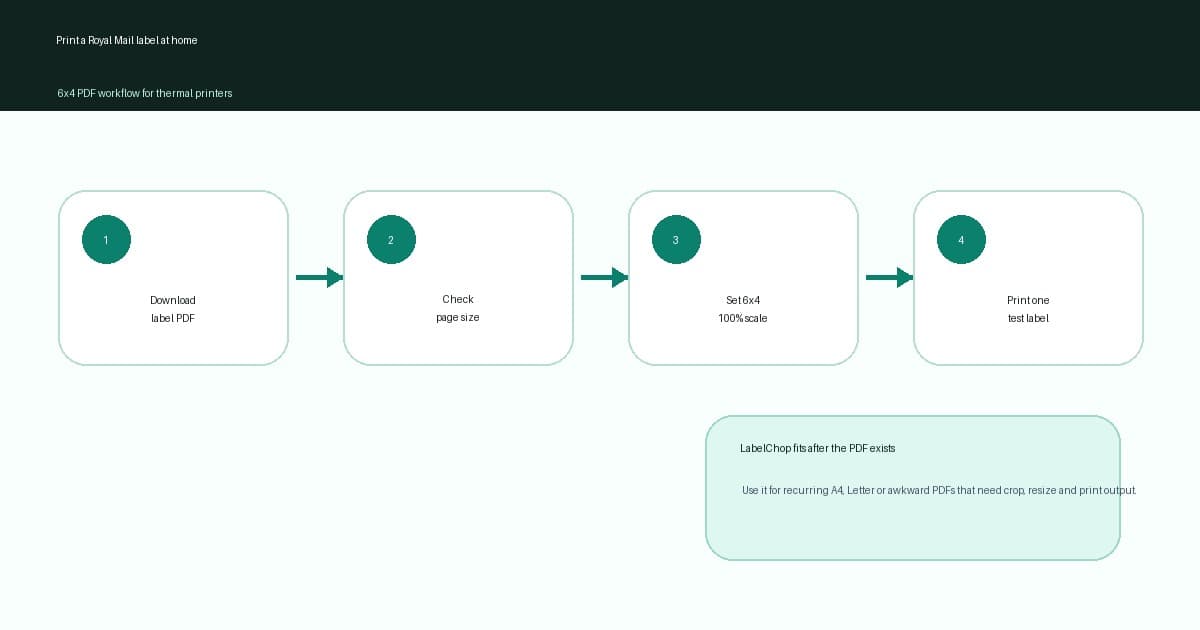
The quick home-print workflow
Use this sequence when you already have a Royal Mail label or Click & Drop label ready to print.
- Download the label PDF instead of printing blind from the browser.
- Open the file and check the page shape.
- If it is already 6x4, 4x6 or close to 100x150mm, keep the file as it is.
- If it is A4 with a label inside the page, crop or convert the label area first.
- Set the printer driver to 6x4, 4x6, 100x150mm, 102x152mm or the exact stock size.
- Print at actual size, no scaling or 100 percent.
- Print one label before a batch and check the barcode, address and edges.
That order matters. A printer setting cannot fix a bad source page. If you send a whole A4 sheet to a 6x4 printer, the printer sees the whole A4 page, not just the label sitting inside it.
For the broader setup version, use the Royal Mail label printer setup guide. If you are still choosing hardware, read the best label printer for Royal Mail Click & Drop checklist first.
Check whether you have a QR code, 6x4 PDF or A4 PDF
Before touching printer settings, identify what the postage workflow gave you.
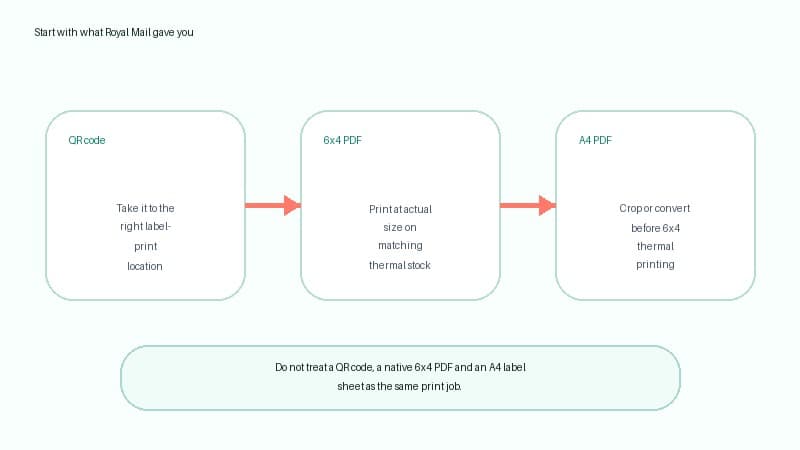
| What you have | What it means | Best next step | |---|---|---| | QR code | Usually a handoff for a counter or drop-off label-printing service | Follow the instructions from the postage workflow | | Native 6x4 PDF | Best case for home thermal printing | Print at actual size on matching stock | | A4 PDF with one label inside | Office-paper format | Crop or convert before printing on 6x4 stock | | A4 PDF with multiple labels | Sheet or batch format | Split or crop only if your workflow supports it safely | | Screenshot or pasted image | Lower-quality copy of the label | Go back to the original PDF if possible |
If you only received a QR code, you may not need a printer at all. Use the Royal Mail QR code label printing guide to separate counter-scanned QR workflows from downloadable PDF label workflows.
If you received a PDF, inspect the page before printing. A native thermal PDF fills its small page. An A4 PDF has a larger office-paper canvas around the shipping label. That canvas is why the label can print tiny when sent straight to a thermal printer.
Royal Mail's shop describes one of its thermal label rolls as 152 x 102mm, or 6 by 4. That is the physical target. Your PDF, driver and print dialog still need to match it.
Set the 6x4 thermal-printer defaults
The printer driver should match the labels physically loaded in the printer, not the size of the PDF you happened to download.
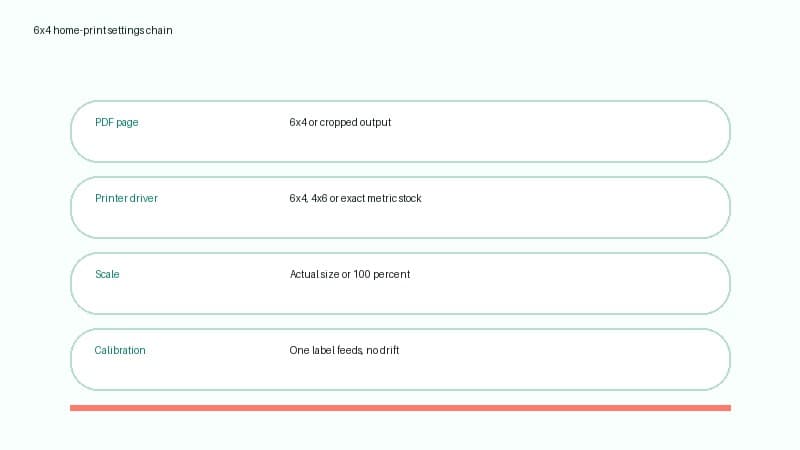
Use these baseline settings for most 4 inch thermal printers.
| Setting | Use this | Why it matters | |---|---:|---| | Paper size | 6x4, 4x6, 100x150mm or exact custom size | Matches the loaded stock | | Scale | Actual size, no scaling or 100 percent | Prevents quiet shrinking | | Orientation | Match the preview and stock direction | Stops sideways or clipped output | | Margins | None or minimum | Keeps barcode quiet zones clear | | Calibration | Run after loading a roll | Helps the printer stop at each label | | Darkness | Dark enough for clean barcode lines | Prevents faint or bleeding barcodes |
Dymo, Zebra, Brother, MUNBYN, Rollo and other printers expose these options differently. The practical check is the same: save the paper size in the operating-system printer preferences where possible, not only inside Chrome, Edge, Acrobat or Preview.
If the printer brand is the variable, use a focused checklist before changing the whole workflow. The Dymo 4XL Royal Mail 6x4 setup guide covers the Dymo paper preset and scale checks, while the Brother QL-1100 Royal Mail setup covers Brother QL-1100 and QL-1110NWB queue and media-size issues.
If your labels are sold as 100x150mm, use 100x150mm. If they are sold as 102x152mm, use that. A6 is close to 6x4, but it is not identical. If the barcode is clipping, create or choose the real paper size instead of using A6 as a shortcut.
For more size detail, use the Royal Mail label size guide for 6x4 printing. If you want the shortest practical check, run the Royal Mail 6x4 label settings checker before printing paid postage.
Print the Royal Mail PDF at actual size
Once the PDF page and driver match, print one label at actual size.
Avoid these settings for normal shipping-label PDFs unless you are deliberately testing them:
- Fit to page
- Shrink oversized pages
- Scale to printable area
- Fill entire page
- Borderless enlargement
- Browser headers and footers
- Extra browser margins
Those options sound helpful because they make office documents fit on paper. For shipping labels, they often shrink the barcode, move the address block or clip the edge.
If the PDF is a true 6x4 page, 100 percent scale should keep it clean. If the PDF is A4, 100 percent scale is not enough. You still need to crop or convert the label area first because the full A4 page is the thing being printed.
Print one label before a batch. Check that the barcode is sharp, the whole label sits inside the edge, the address is readable and the next blank label starts in the right place. Thermal printers are fast, which is great only after the setup is right.
Fix tiny, cut-off, sideways or blurry labels
Use the symptom to choose the next fix. Do not change every setting at once.
The Royal Mail label prints tiny
This usually means an A4 PDF is being shrunk onto 6x4 stock.
Fix it like this:
- Cancel the print job.
- Open the PDF and check the page size.
- If it is A4, crop or convert the label area before printing.
- Set the driver to the real thermal label size.
- Print the cropped or converted PDF at actual size.
For a deeper diagnosis, use the shipping label printing too small guide.
The barcode or address is cut off
A cut-off label usually means the PDF page, driver paper size, orientation or calibration does not match.
Check the driver paper size first. Then check orientation and margins. If the second or third label starts lower down the roll, recalibrate the printer after loading the stock.
Do not ship a label with a clipped barcode just because the address still looks readable. Scanning is the point of the label. Use the shipping label cut-off troubleshooting guide if one edge keeps disappearing.
The label prints sideways
Sideways printing usually comes from width and height being named differently across the PDF, driver and print dialog.
A seller might say 6x4. A printer driver might say 4x6. A metric preset might say 100x150mm or 150x100mm. Pick the setting that makes the preview match the stock in your hand.
If the source PDF is A4, crop first. Rotating a bad A4 canvas still leaves you with a bad A4 canvas.
The barcode looks blurry
Avoid screenshots and pasted images. They turn a sharp PDF into pixels, then the print dialog may scale those pixels again.
Use the original PDF where possible. If the page is the wrong size, crop or convert the PDF rather than screenshotting it into a document. If the PDF is already correct, check darkness, speed, print-head cleanliness and direct thermal stock.
The blurry shipping label barcode guide covers DPI, darkness and screenshot problems in more detail.
When home printing should become automated
Manual printing is fine if you ship a few parcels a week and your Royal Mail labels always download as clean 6x4 PDFs.
Automation starts to make sense when the same boring cleanup keeps coming back:
- Download the label.
- Open the PDF.
- Notice it is A4, Letter, rotated or awkwardly sized.
- Crop or convert the label area.
- Check the print dialog.
- Print one label.
- Repeat the same thing tomorrow.
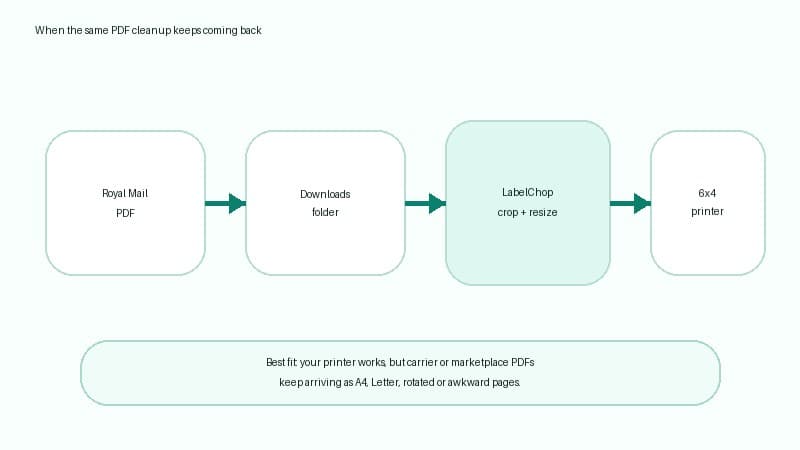
That is where LabelChop fits. It watches a folder, detects compatible shipping-label PDFs, crops or resizes awkward pages to 4x6 or 100x150mm output, then prints or saves the result for your normal thermal-printer setup.
LabelChop is not an official Royal Mail integration. It does not buy postage, manage Click & Drop orders or replace your printer driver. It helps after the label PDF exists, especially when Royal Mail, marketplace or shipping-tool PDFs keep arriving in formats that need the same crop-and-print routine.
For one awkward PDF, use the free A4 to 4x6 shipping label converter. If you are not sure what size the file is, use the shipping label size checker or carrier format label tool. If the same fix has become part of fulfilment, compare the time cost with LabelChop pricing.
Related Royal Mail and 6x4 guides
Use these next depending on where the home-print workflow is failing.
- Royal Mail label printer setup guide, for the full printer setup path.
- Royal Mail 6x4 label settings checker, for a quick PDF size, driver preset and scale check.
- Royal Mail label size guide for 6x4 printing, for 6x4, 4x6, 100x150mm, A6 and A4 sizing.
- Royal Mail QR code label printing guide, if you are not sure whether you need a printer at all.
- 4x6 shipping labels print settings, for scale, margins and thermal-printer settings across carriers.
- A4 to 4x6 shipping label converter, for one-off Royal Mail or marketplace PDFs that need cropping before printing.
The safe home-print rule is simple. Work from the file outward: QR code or PDF, PDF page size, driver paper size, actual-size scale, then one test label. Once that chain is boring, your Royal Mail labels stop wasting time at the packing bench.